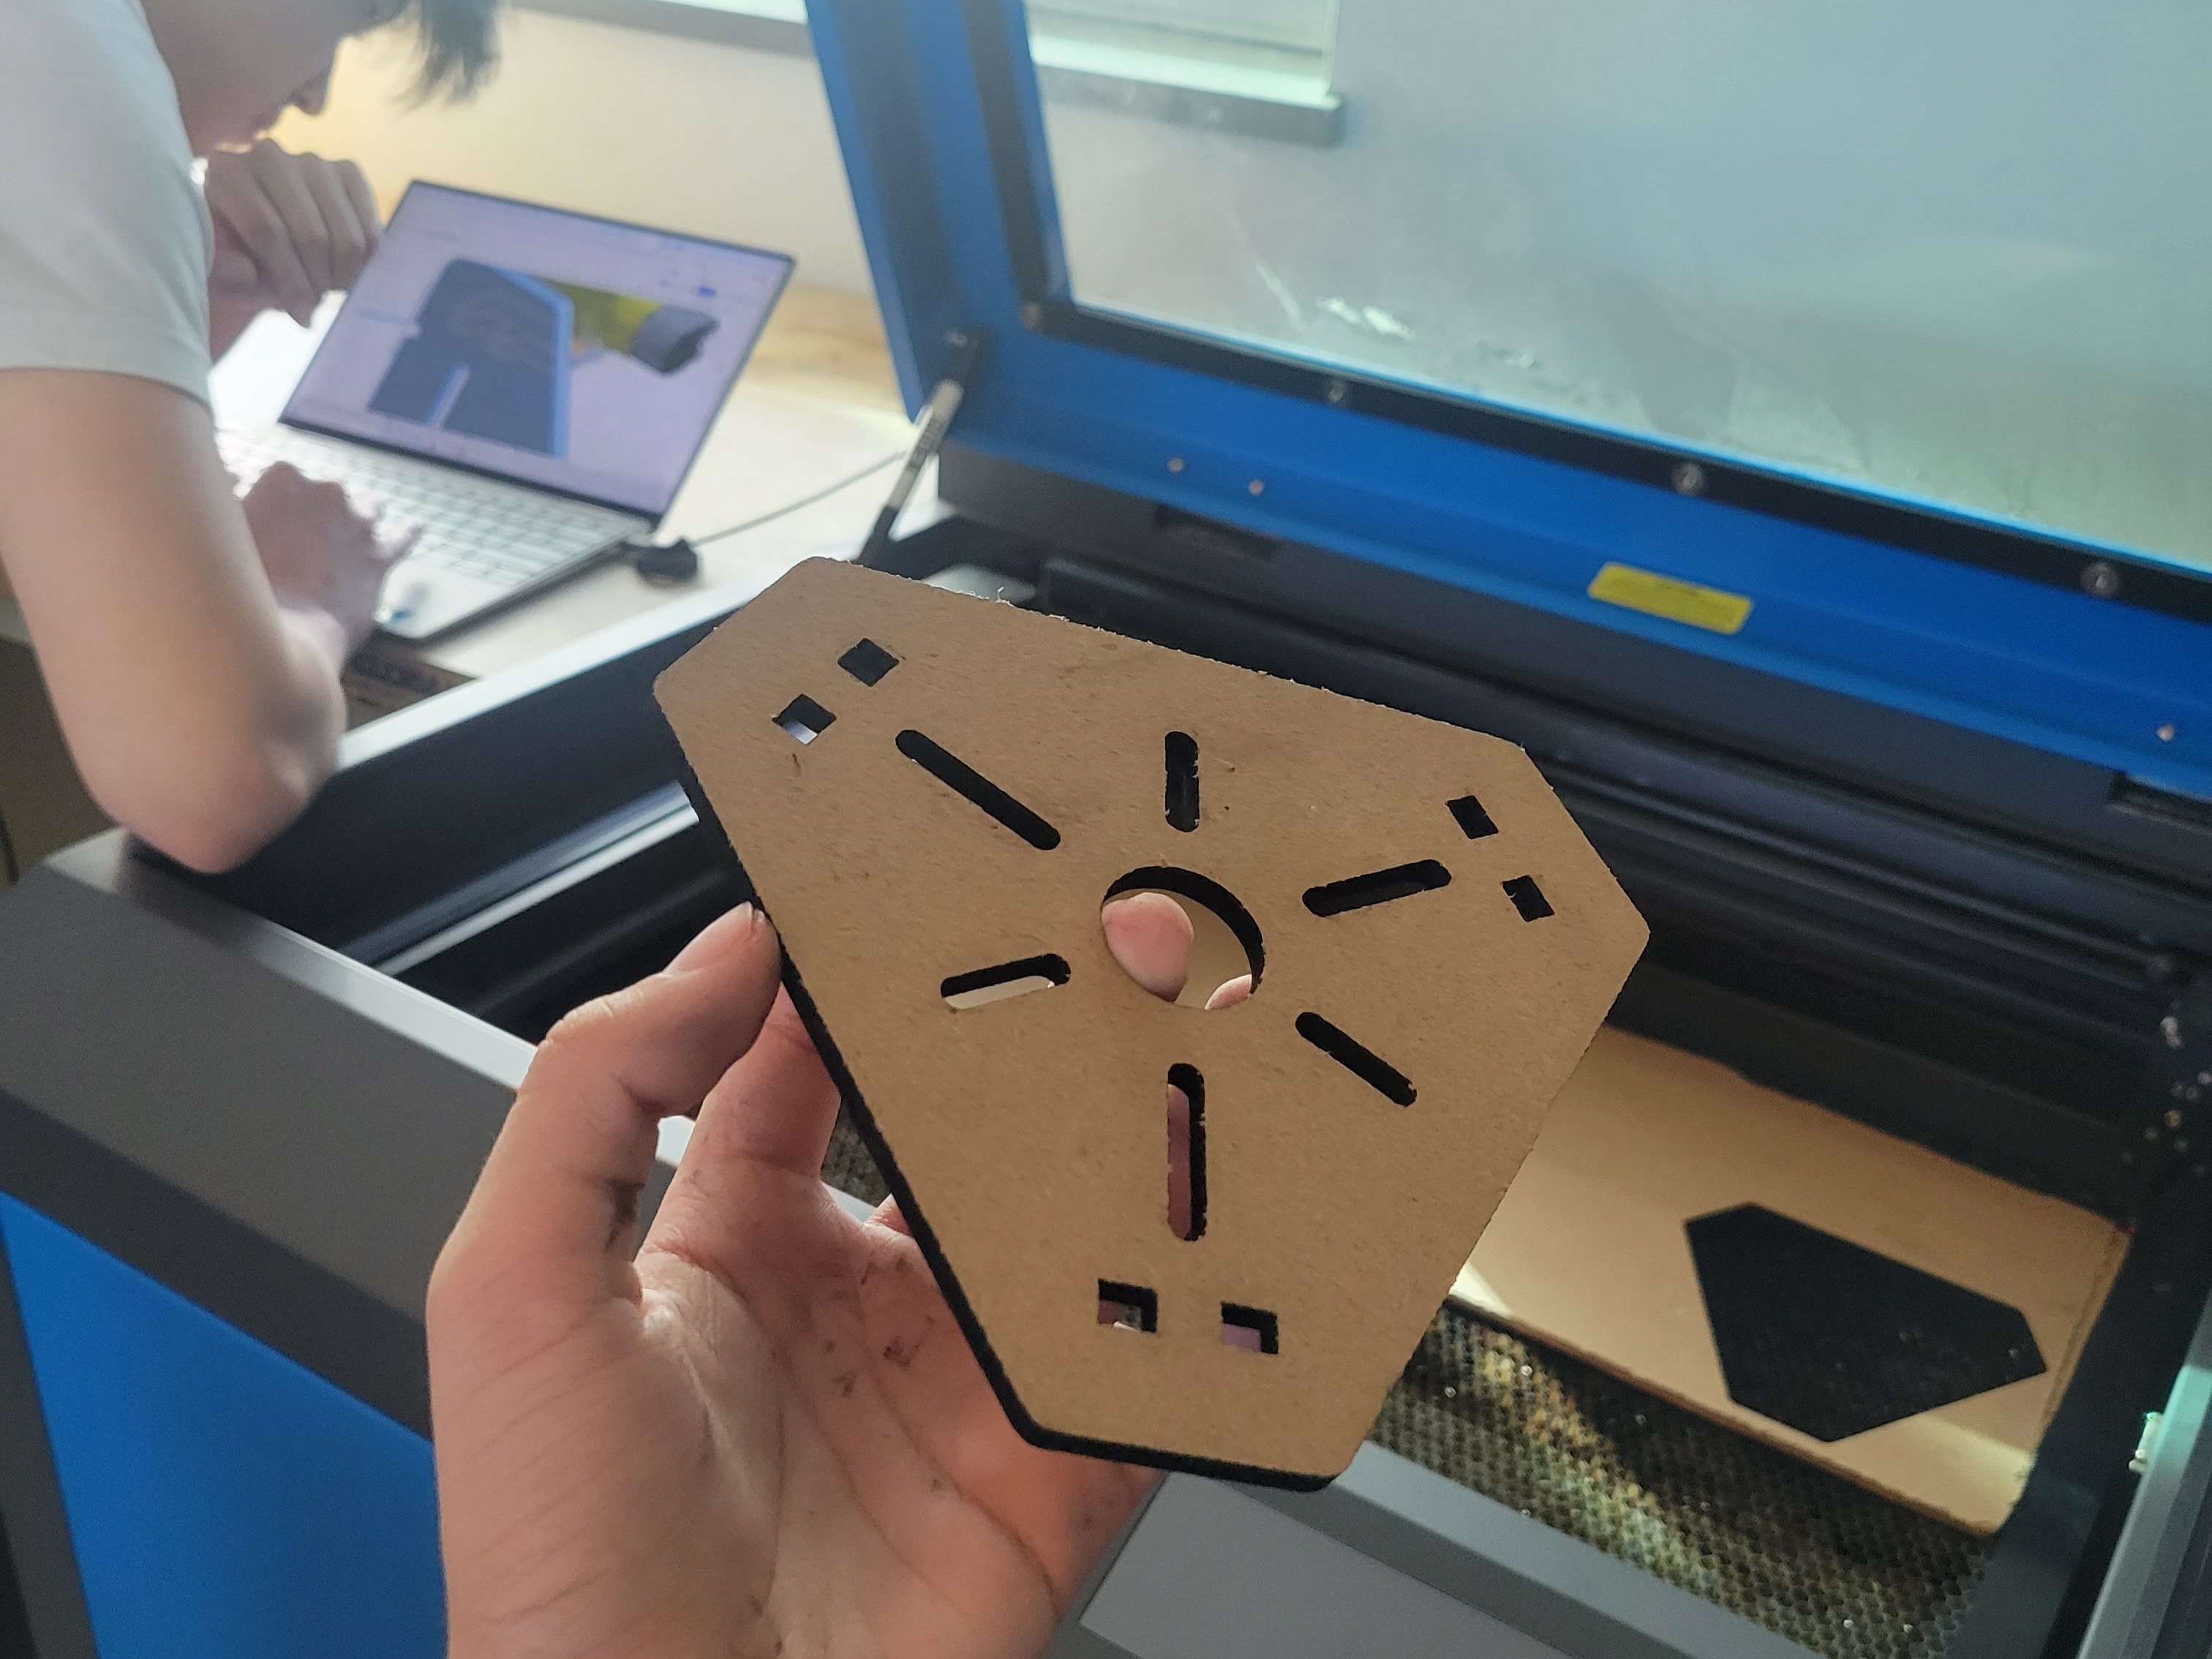


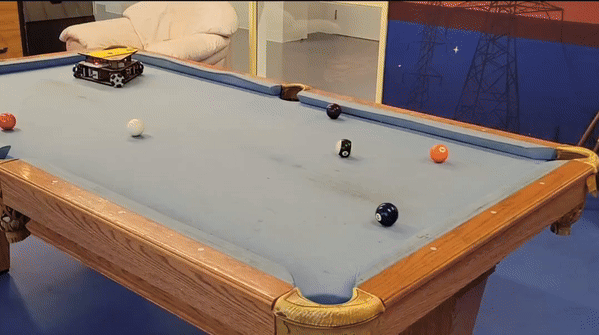
Work is still in progress, and I'll continue to update the page as I move forward. However, here are some highlights:

side view (speed x2)
top view (speed x2)
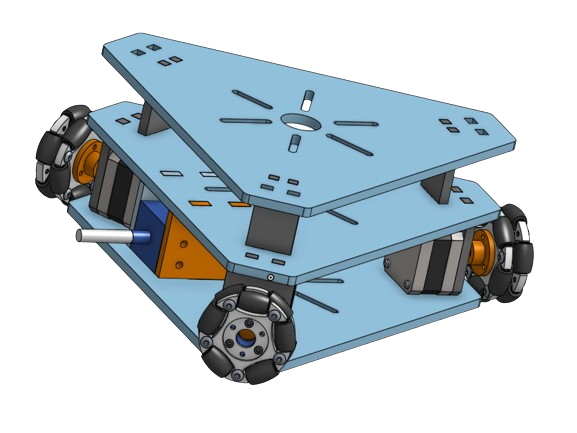
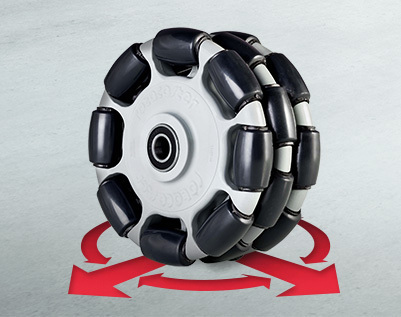
The omnidirectional wheel, as the name suggests, can move in any direction, at any angle, and in any direction. Therefore, compared to the traditional differential drive method, the omnidirectional wheel can complete the rotation while translating, more info
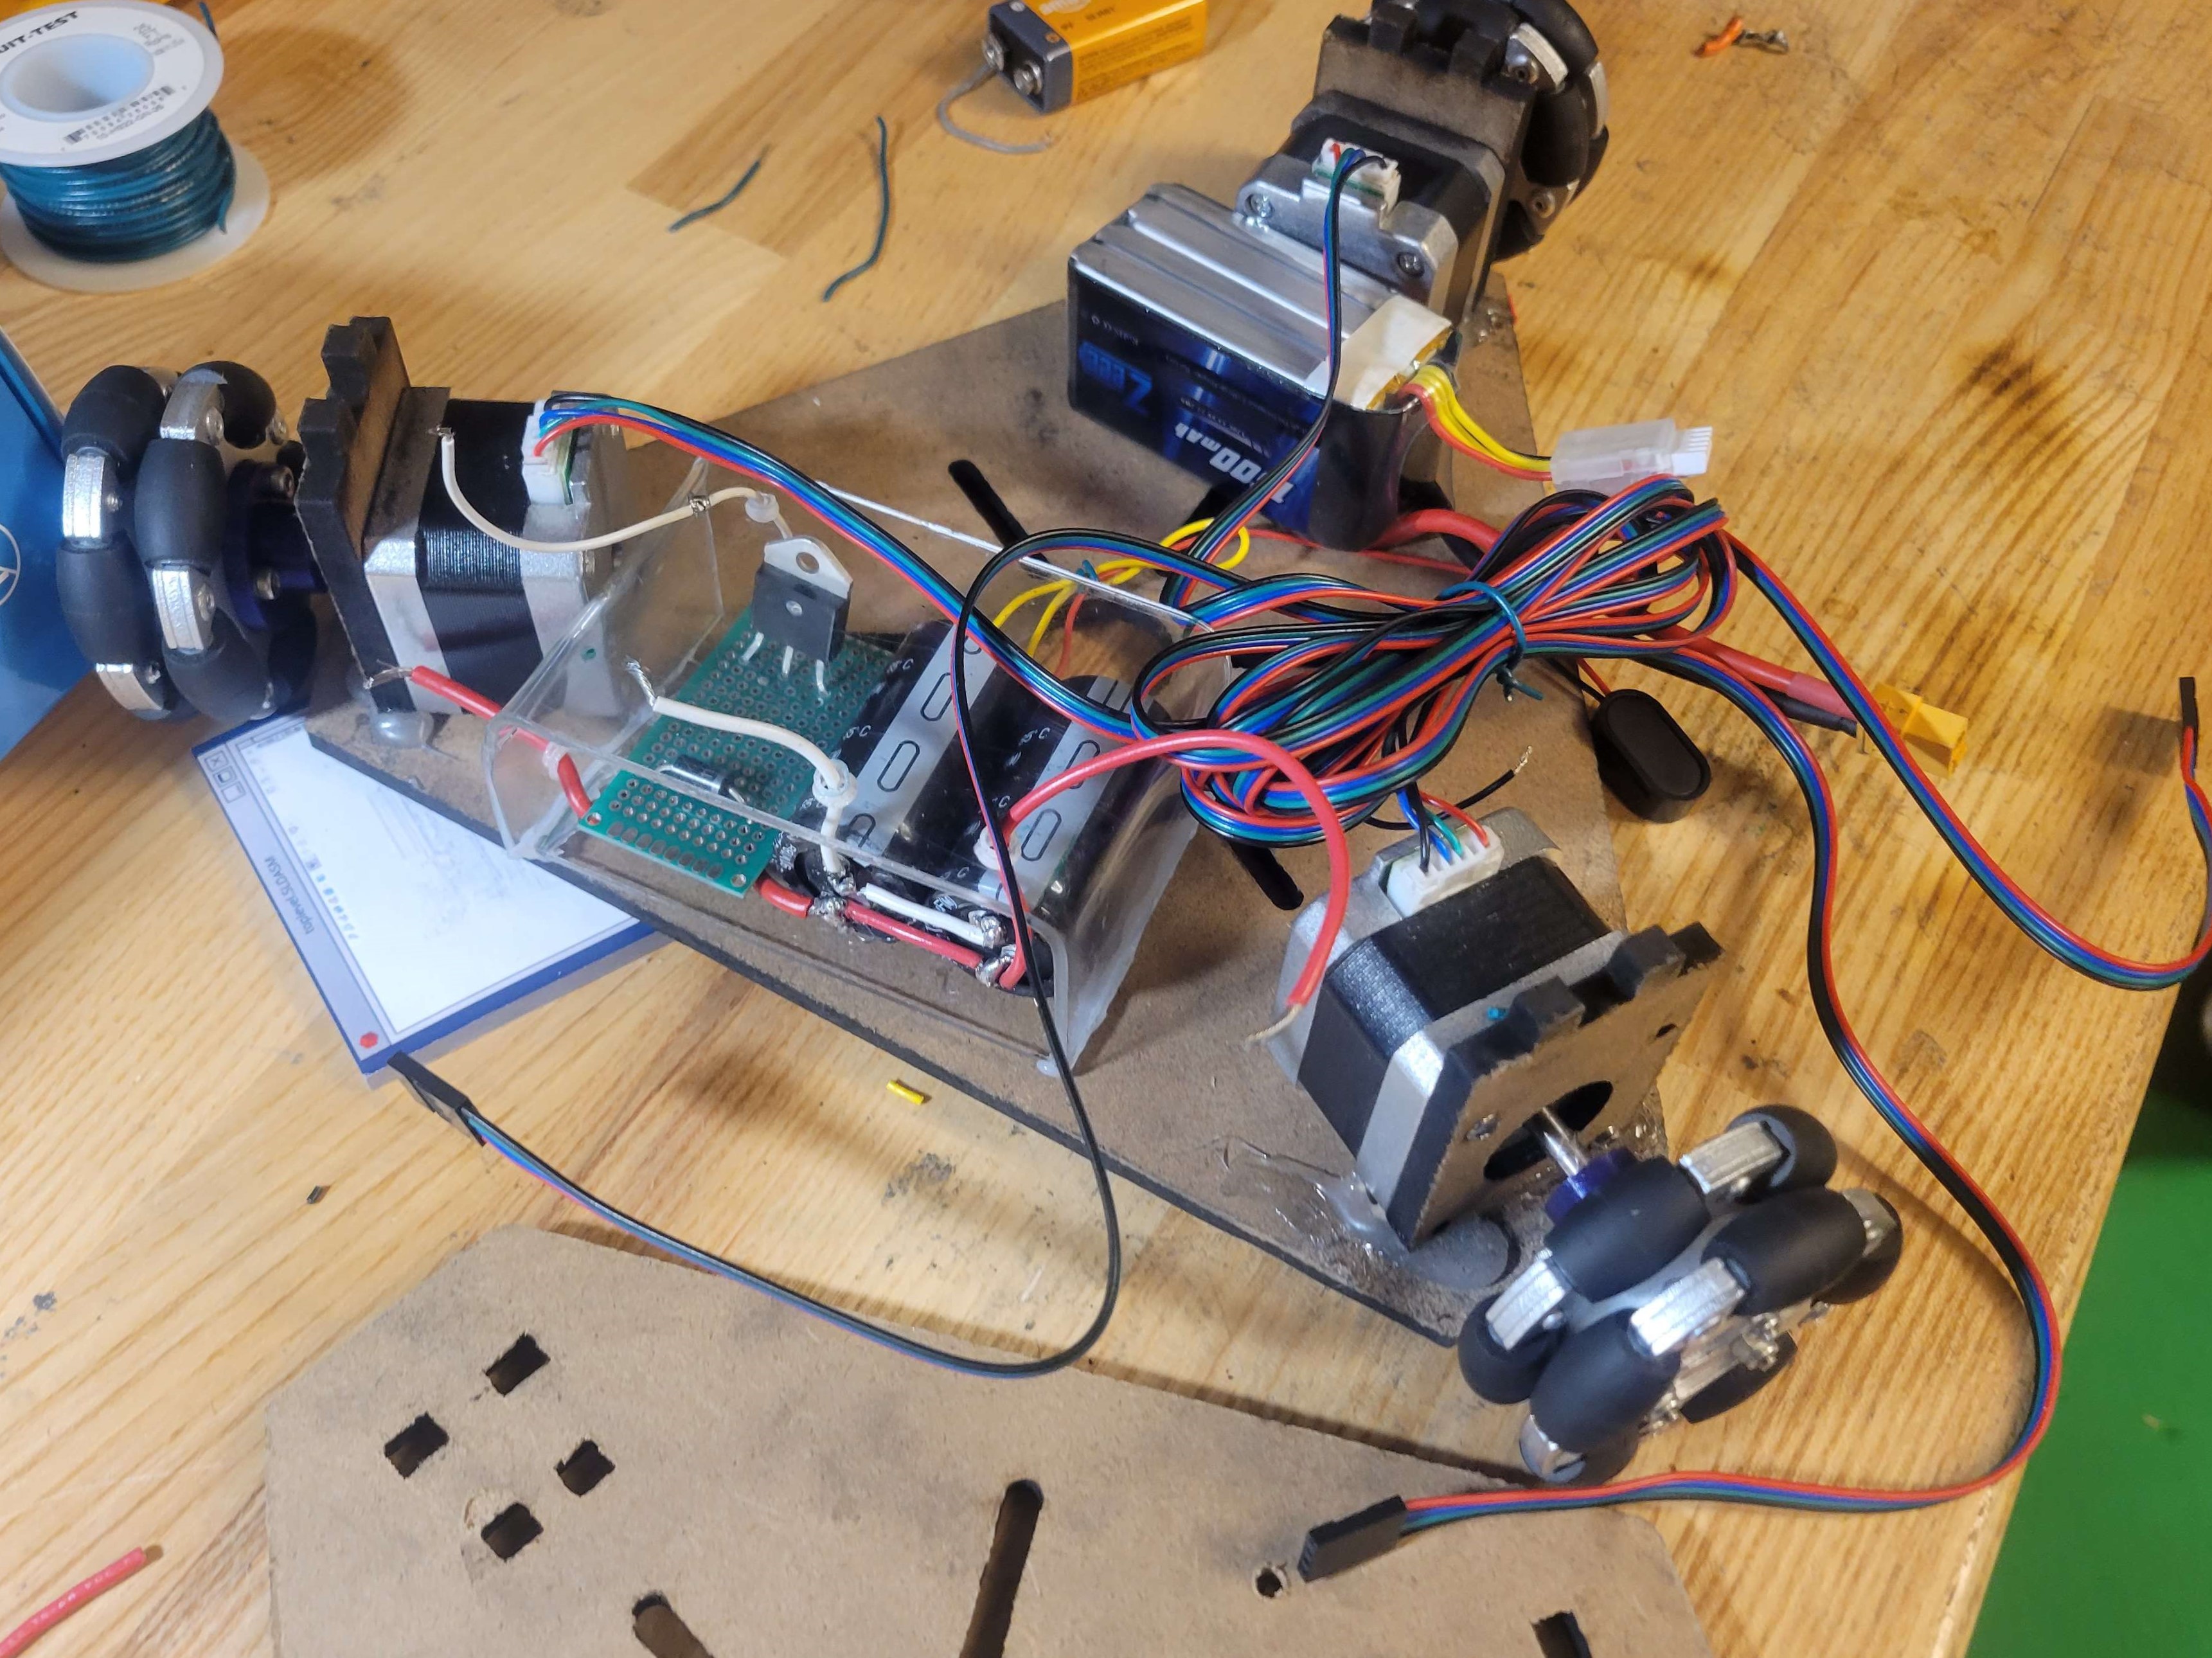
We also decided after reading some papers comparing 3 based / 4 wheel based structres we decided on 3 wheels mainly due to costs
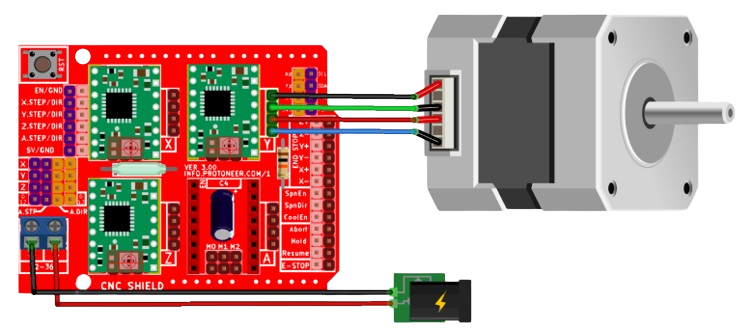
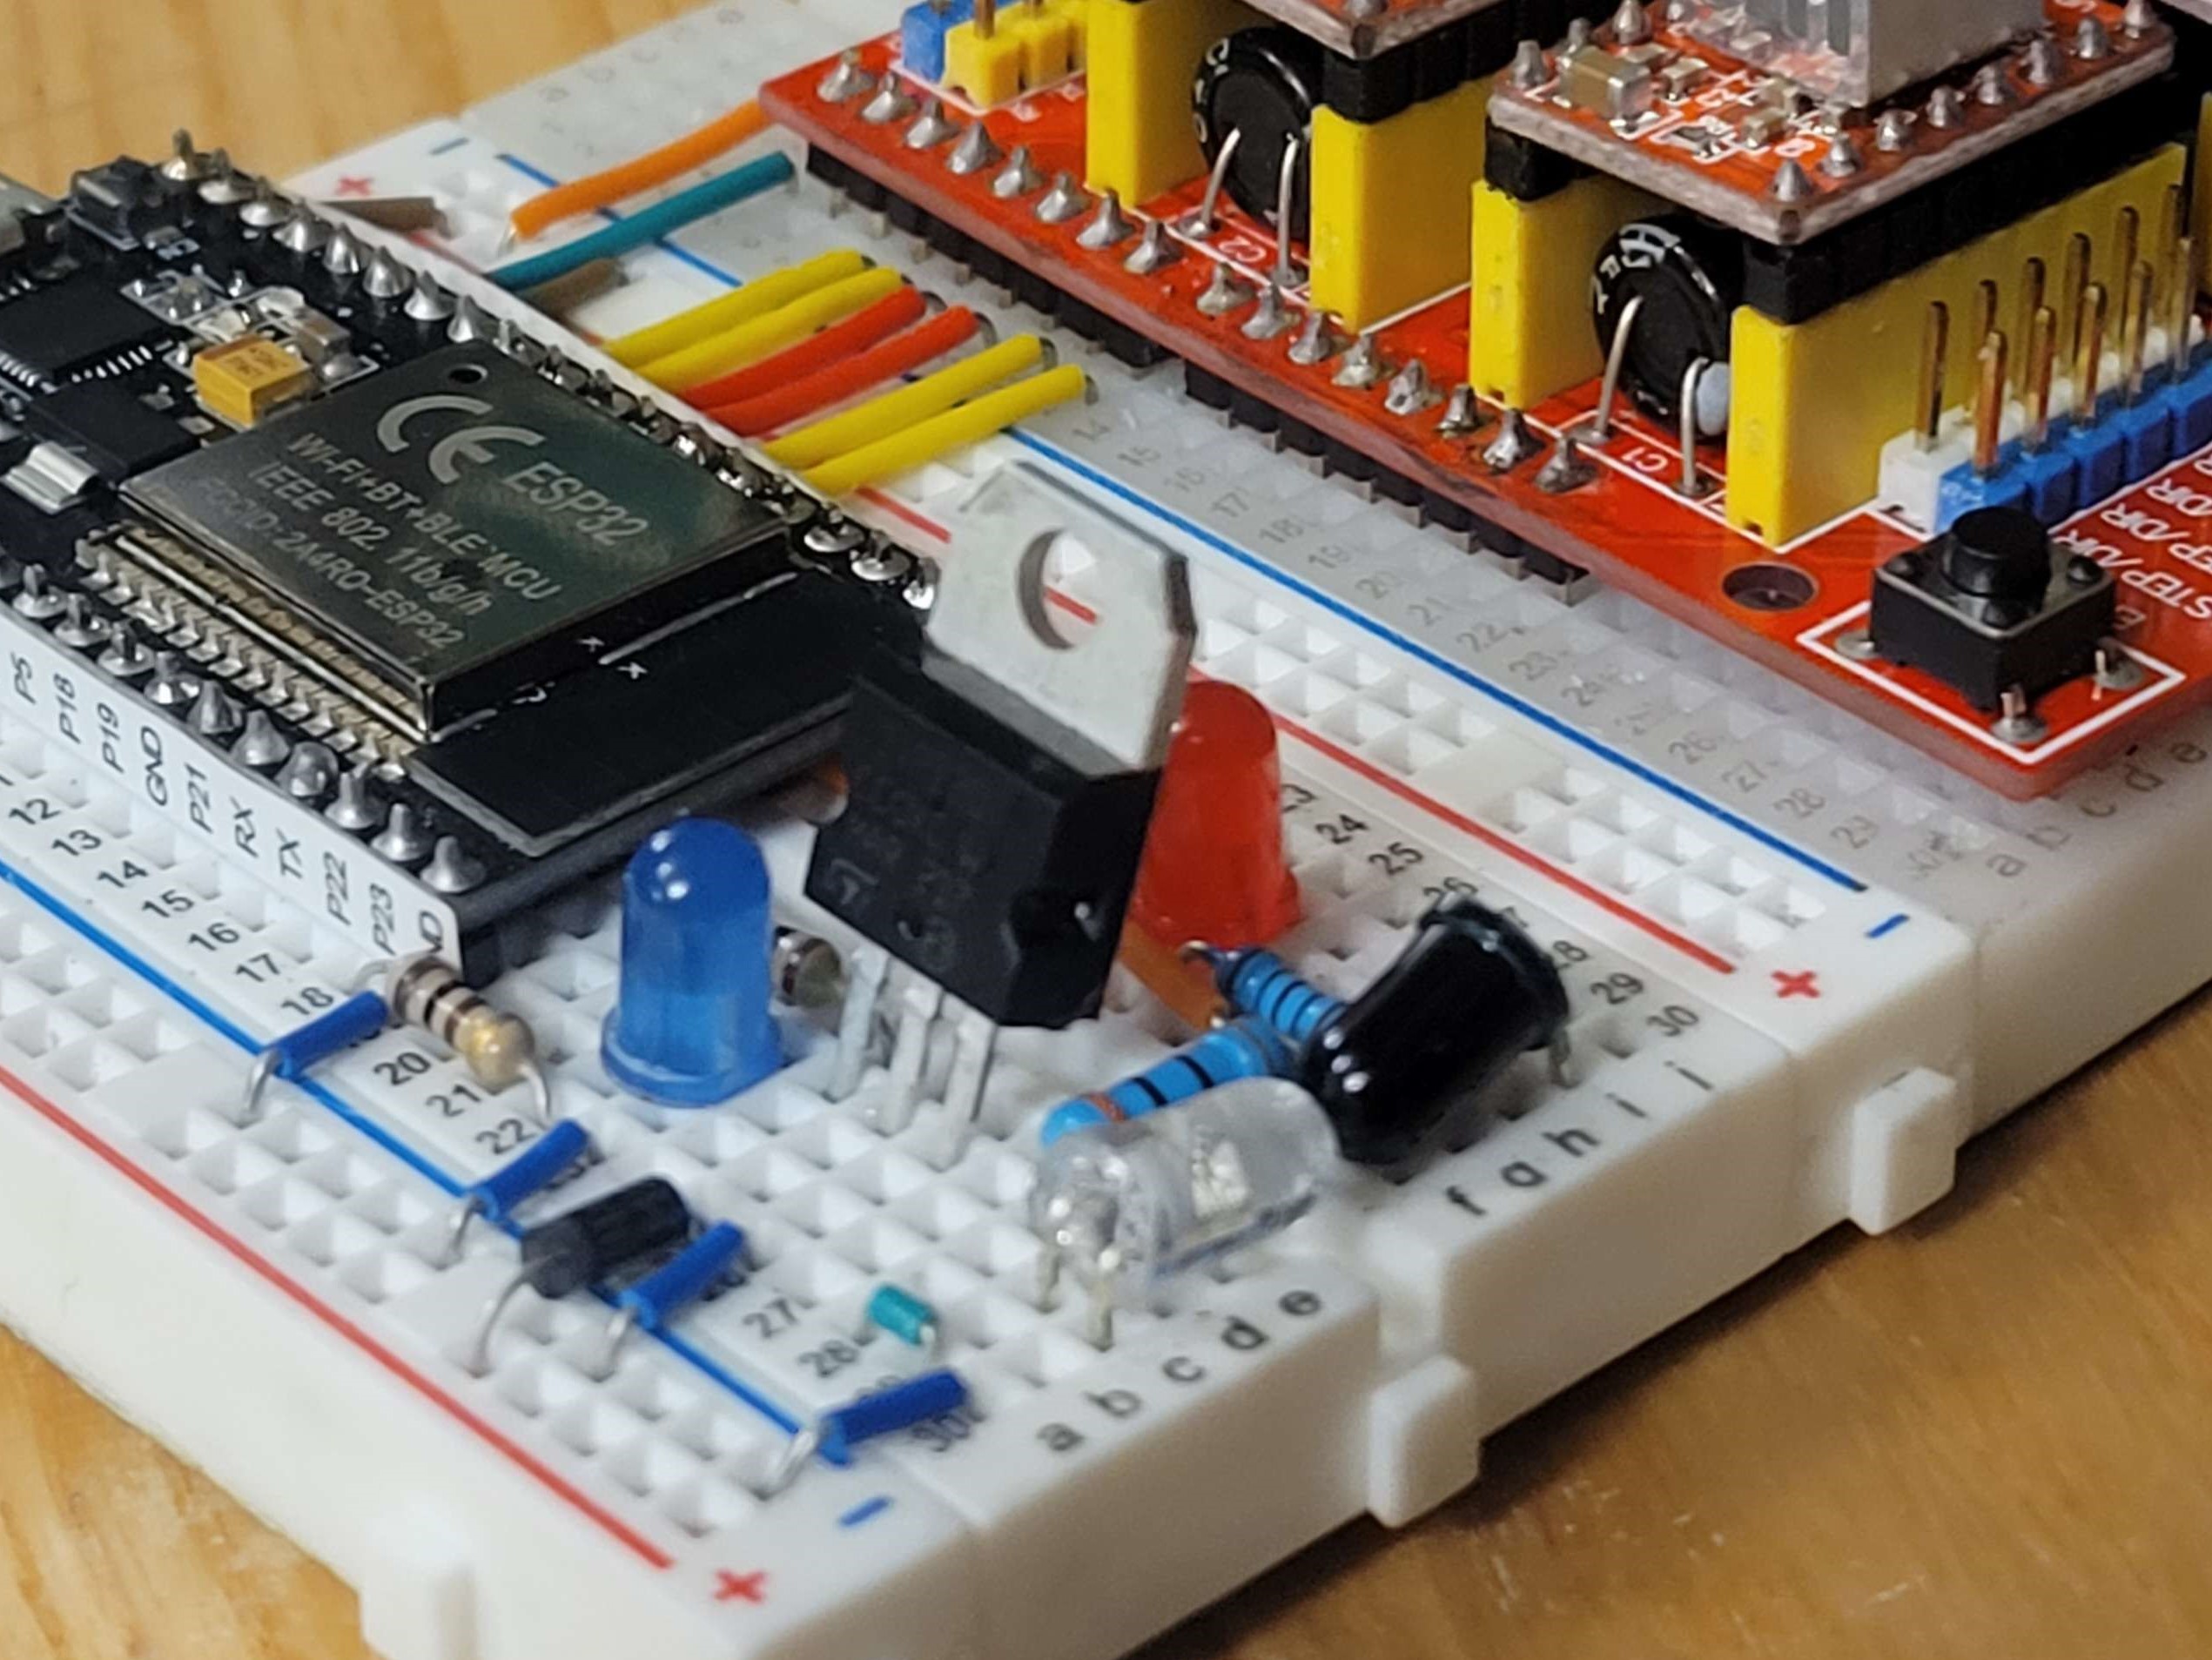
We chose stepper motors over other types for their precision, prioritizing accuracy over speed or torque. Despite the manual cable connection required due to our use of an ESP32 instead of an Arduino Uno, the CNC shield facilitated wiring and enabled microstepping (increasing the resolution from 200 to 1600 steps per revolution), enhancing the robot's precision.
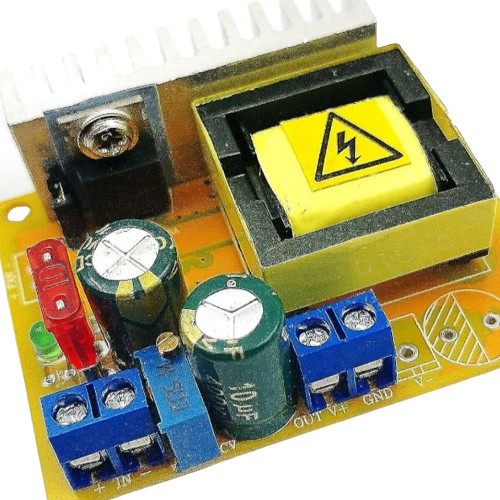
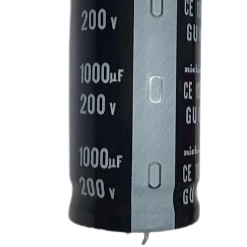
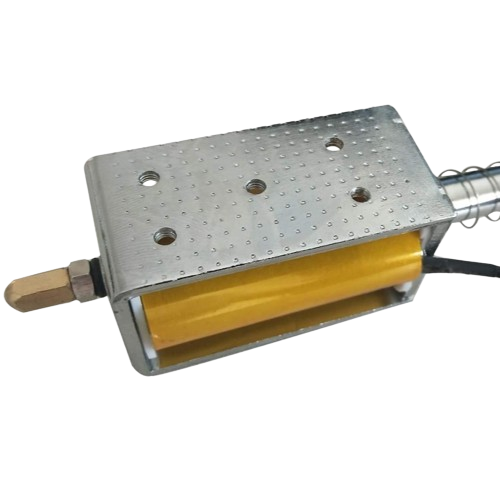
Essentially, we utilize a voltage booster to elevate the voltage from 14V to 200V for charging the capacitors, and subsequently discharge the stored energy, leading to the impact on the ball.

Increasing the voltage equates to increasing the power output. The concept is to create three distinct levels of power for the shots: a weak shot, a medium shot, and a strong shot. This is achieved by timing the charging process and interrupting the current flow to the capacitors when they reach a certain percentage of charge.
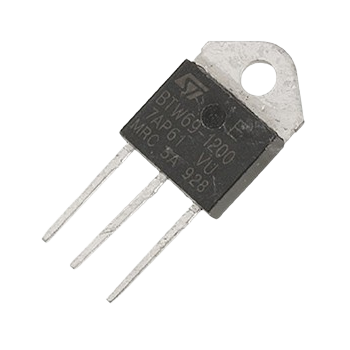
The full diagram includes components such as optocouplers, thyristors explained in detail in my CoilGun project a 4s LiPo battery, a buck converter for voltage stability, and a 7-segment voltage reader.


I intend to make a more comprehensive circuit with a professional software later on
Signals circuit

High voltage caps + thyristor

Puncher test
First layer circuit

Second layer circuit
You can find the source code here: GitHub
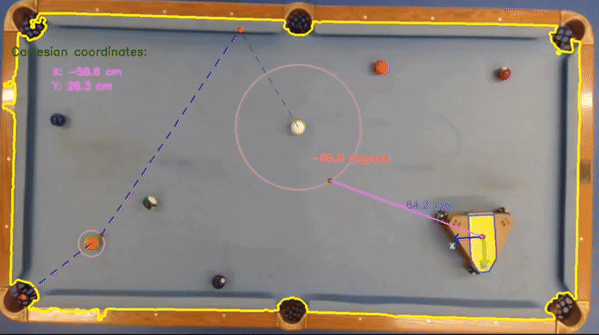
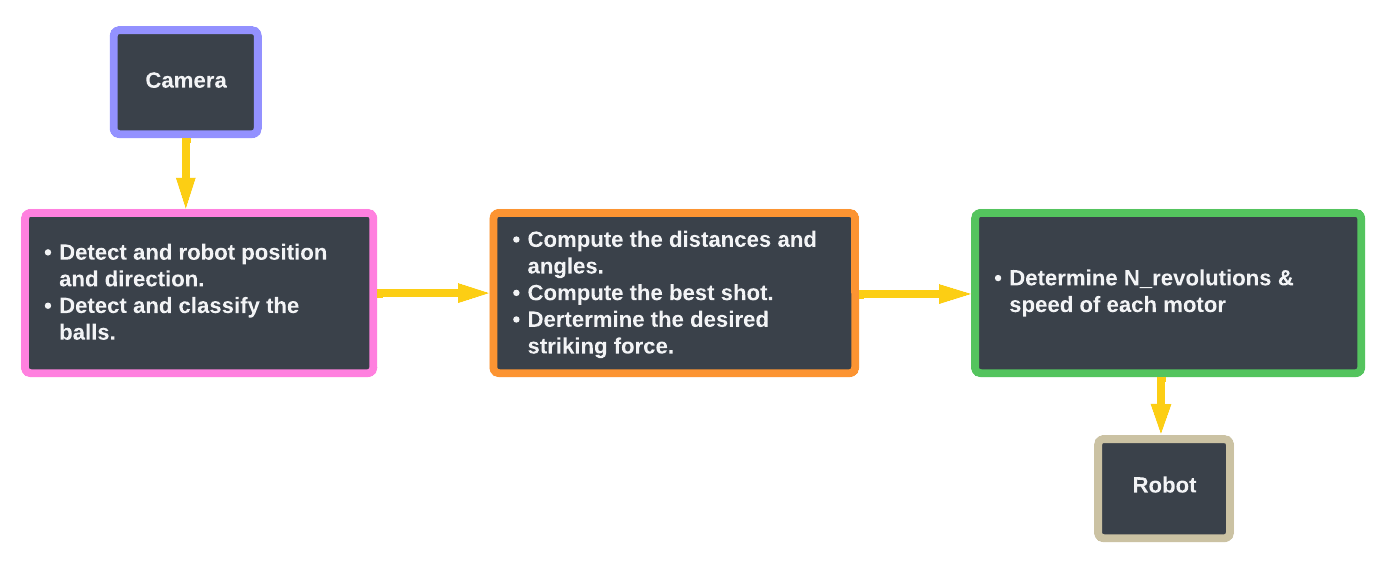
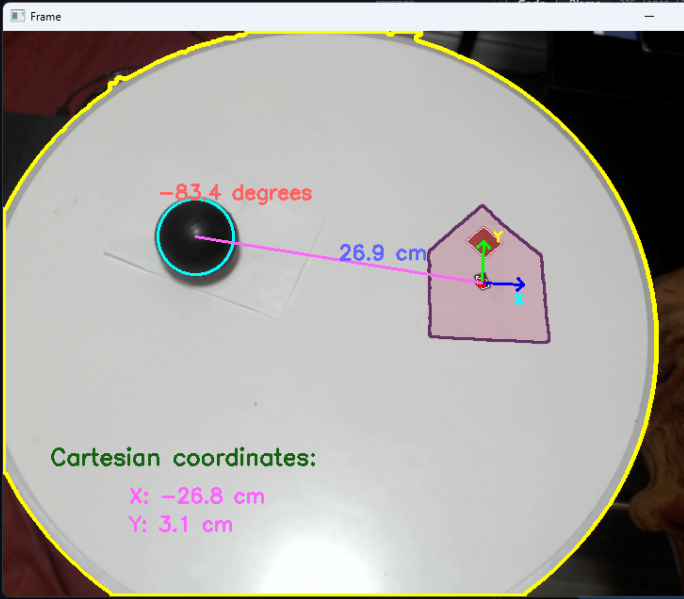
The camera is positioned on top, and we use computer vision with OpenCV to handle ball detection, measurements, and path decisions. Afterward, Python sends a command to the ESP32 via WiFi to maneuver the robot to specific coordinates. Once it reaches the designated position and orientation, we charge the capacitors to 200V and then discharge them through the solenoid, resulting in striking the ball.


cv2.bitwise_and for such maskings 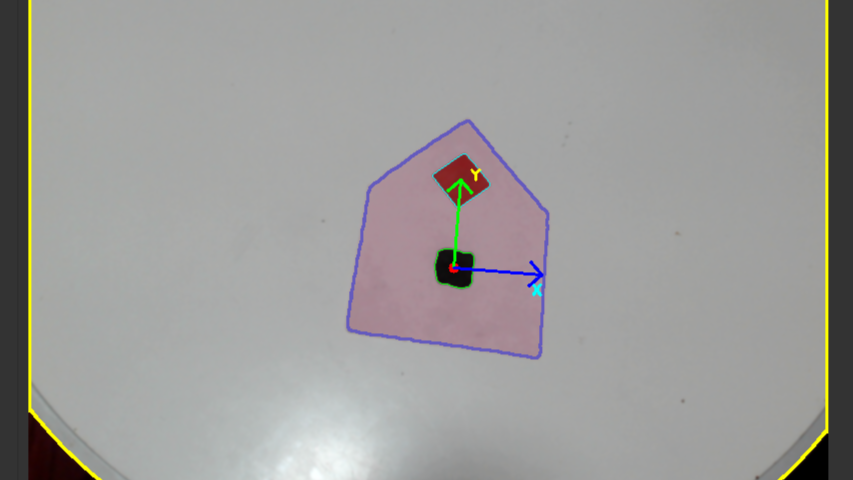
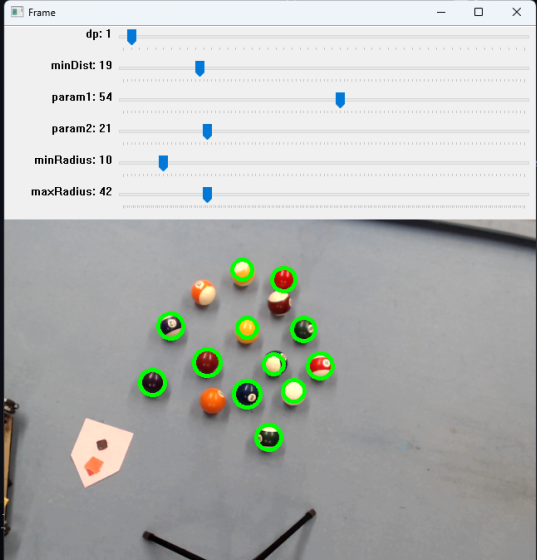
We can only do much with computer vision even if we carefully tuned the paramters of cv2.HoughCirle ML required to detect the ball, we also have to classify them into 4 categories:
There is no need to get to detect the exact number or color of each ball our strategy is to consider all solid balls as valid target and opponent balls as no go
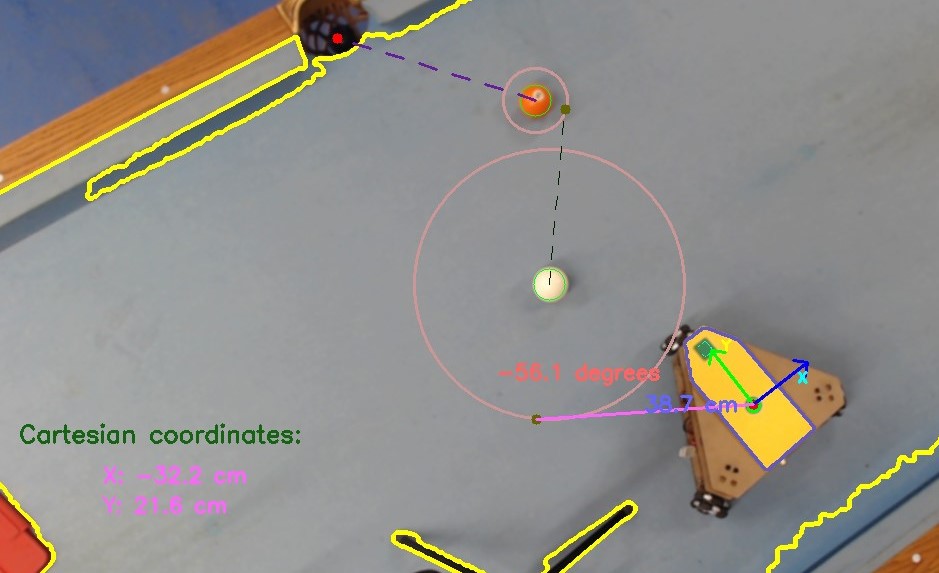
Assuming we have to move from A to B and we have both their coordinates, the motors don't understand distances or angle to we have to do some calculations to give the robot number of steps and speed of motor
We have two option:
First rotation then translation
Vector addition to move from A->B without rotating
give the angle and the distance, we take raduis of the wheel.... to calculate the number of steps required for rotation for the angle and same thing for translation

This one is harder as it involves vector addition, also required to move the wheels at diffrent speeds to finish at the same time we will lose the vector addition calculation so dependind on the distination if wheel X have 800 steps and wheel Y have 400 steps we will move wheel X at 2 of the speed of wheel Y in order to finish at the same time.
A challenge arises when a small angle results in a disproportionate step count between wheels, such as wheel Y at 200 steps and wheel Z at 3000 steps. To synchronize their finish times, Z must rotate 15 times faster than Y. However, setting Y to an extremely slow speed leads to vibrations, as stepper motors struggle with very slow speeds, even with microstepping. Conversely, setting X to a moderate speed that avoids vibrations still poses a problem, as Z's required 15x faster rotation could destabilize the robot and cause missteps.

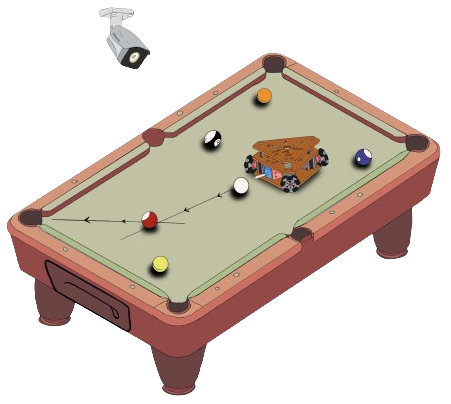
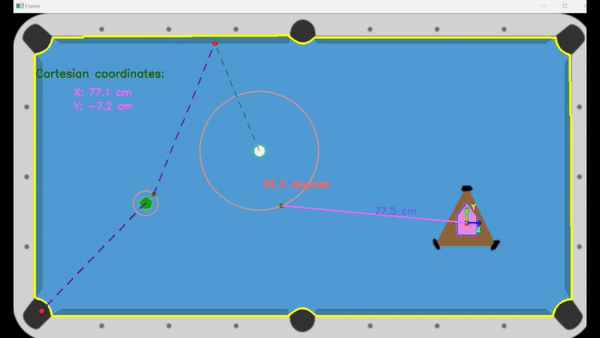
To ease the testing process in the devolepment phase, I created a physics simulation of the pool table to test my code on it. So given the position of the cue ball the target ball the pocket and the boundary of the table we can calculate the point and direction of the robot to strike the cue ball have it bounce and hit the target ball and have it go to the pocket.
ESP32 is a microcontroller that has both WIFI capabilities, we use it to control the motors and the solenoid, so we have it connect to WIFI (same as computer) then we had multiple routes
/control: Accepts 6 parameters to control the motors (StepsX,
SpeedX, StepsY, SpeedY, StepsZ, SpeedZ)/status: Check wether the robot is done mooving or no (returns
True/False)
/stop: Stops the robot (emergency command)/strike: Charges capacitors and discharges into the solenoid,
with an
adjustable charging time for customizable force. The goal was being able to control individaully each wheel with a specefic revolution and speed
and have them turn at the same time, doing so direclty is challanging because of the way stepper
motor works with loops and delay, thankfully I found a library:
AccelStepper that allows that without
manually coding the millis and non-blocking functions
                            //ESP-32 CODE

//setting up the server route
server.on("/control", HTTP_GET, [](AsyncWebServerRequest *request){
    String stepsX, speedX, stepsY, speedY, stepsZ, speedZ;

    if (request->hasParam("stepsX") && request->hasParam("speedX") &&
        request->hasParam("stepsY") && request->hasParam("speedY") &&
        request->hasParam("stepsZ") && request->hasParam("speedZ")) {

        stepsX = request->getParam("stepsX")->value();
        speedX = request->getParam("speedX")->value();
        stepsY = request->getParam("stepsY")->value();
        speedY = request->getParam("speedY")->value();
        stepsZ = request->getParam("stepsZ")->value();
        speedZ = request->getParam("speedZ")->value();

        controlSteppers(stepsX.toInt(), speedX.toFloat(), stepsY.toInt(), speedY.toFloat(), stepsZ.toInt(), speedZ.toFloat());
        request->send(200, "text/plain", "Motors commanded successfully");
    } else {
        request->send(400, "text/plain", "Invalid parameters");
    }
});


//function to control the motors
void controlSteppers(int stepsX, float speedX, int stepsY, float speedY, int stepsZ, float speedZ) {
    digitalWrite(enablePin, LOW);
    movementComplete=false;

    stepperX.setMaxSpeed(speedX);
    stepperY.setMaxSpeed(speedY);
    stepperZ.setMaxSpeed(speedZ);

    stepperX.move(stepsX);
    stepperY.move(stepsY);
    stepperZ.move(stepsZ);
  }

//then we put it into loop
void loop() {
    stepperX.run();
    stepperY.run();
    stepperZ.run();
}
                            //Python CODE

//#Send a command to the ESP32 to control motor movements.

def send_command(stepsX, speedX, stepsY, speedY, stepsZ, speedZ):

url = f"http://{esp32_ip}/control"
params = {
    'stepsX': stepsX,
    'speedX': speedX,
    'stepsY': stepsY,
    'speedY': speedY,
    'stepsZ': stepsZ,
    'speedZ': speedZ
}
try:
    response = requests.get(url, params=params)
    print(response.text)
except requests.RequestException as e:
    print(f"Error sending request: {e}")


//#Sample command
v=1
stepsX = 1600  *3*0.2
speedX = 500   *2*v

# B
stepsY = -1600  *6*0.2
speedY = 500   *4*v

# A
stepsZ = 1600  *3*0.2
speedZ = 500   *2*v

send_command(stepsX, speedX, stepsY, speedY, stepsZ, speedZ)
ESP_ip_Address/status
comes in handy.
Essentially we have a global variable movementComplete set to False and we set it
to True once we finish the request, on python side we keep requesting /status till
it returns True, only then we send the following send_command() to motors
                      //ESP-32 CODE

//global variable
bool movementComplete = false;

//setting up the server route
server.on("/status", HTTP_GET, [](AsyncWebServerRequest *request){
    if (movementComplete) {
        request->send(200, "text/plain", "Movement complete");
        movementComplete = false; // Reset the flag
    } else {
        request->send(200, "text/plain", "Movement in progress");
    }
});


//make "movementComplete" true when the robot is done moving
if (stepperX.distanceToGo() == 0 && stepperY.distanceToGo() == 0 && stepperZ.distanceToGo() == 0) {
    if (!motorsStopped) {
      delay(500);
      digitalWrite(enablePin, HIGH);
      Serial.println("Motors stopped");
      motorsStopped = true;
      movementComplete = true;

}
                            //Python CODE

//#returns True if the motors stops
def check_movement_complete():
    while True:
        response = requests.get(f"http://{esp32_ip}/status")
        if response.text == "Movement complete":
            break
        time.sleep(0.5)  # Poll every half second

def execute_follow_up_command(translation_steps, motor_speed):
    # Wait for the first command to complete
    check_movement_complete()
    # Execute the second command
    send_command(translation_steps, motor_speed, 0, motor_speed, -translation_steps, motor_speed)

//sample with polar coordinates
if ball_measurements is not None:
    for center, radius, distance, angle, X_coordinate, Y_coordinate in ball_measurements:
        print(f"Distance = {distance:.1f} cm, Angle = {angle:.1f} degrees")

    rotation_steps = -calculate_rotation_steps(angle)
    translation_steps = calculate_translation_steps(distance/100)-100
    print(f"Rotation Steps: {rotation_steps}, Translation Steps: {translation_steps}")

    //translation command
    send_command(rotation_steps, MOTOR_SPEED, rotation_steps, MOTOR_SPEED, rotation_steps, MOTOR_SPEED)
    //rotation command
    threading.Thread(target=lambda: execute_follow_up_command(translation_steps, MOTOR_SPEED)).start()
threading so the program and
the UI won't
freezeThe other ones are more straight forward, for more info check my code on GitHub under firmware.
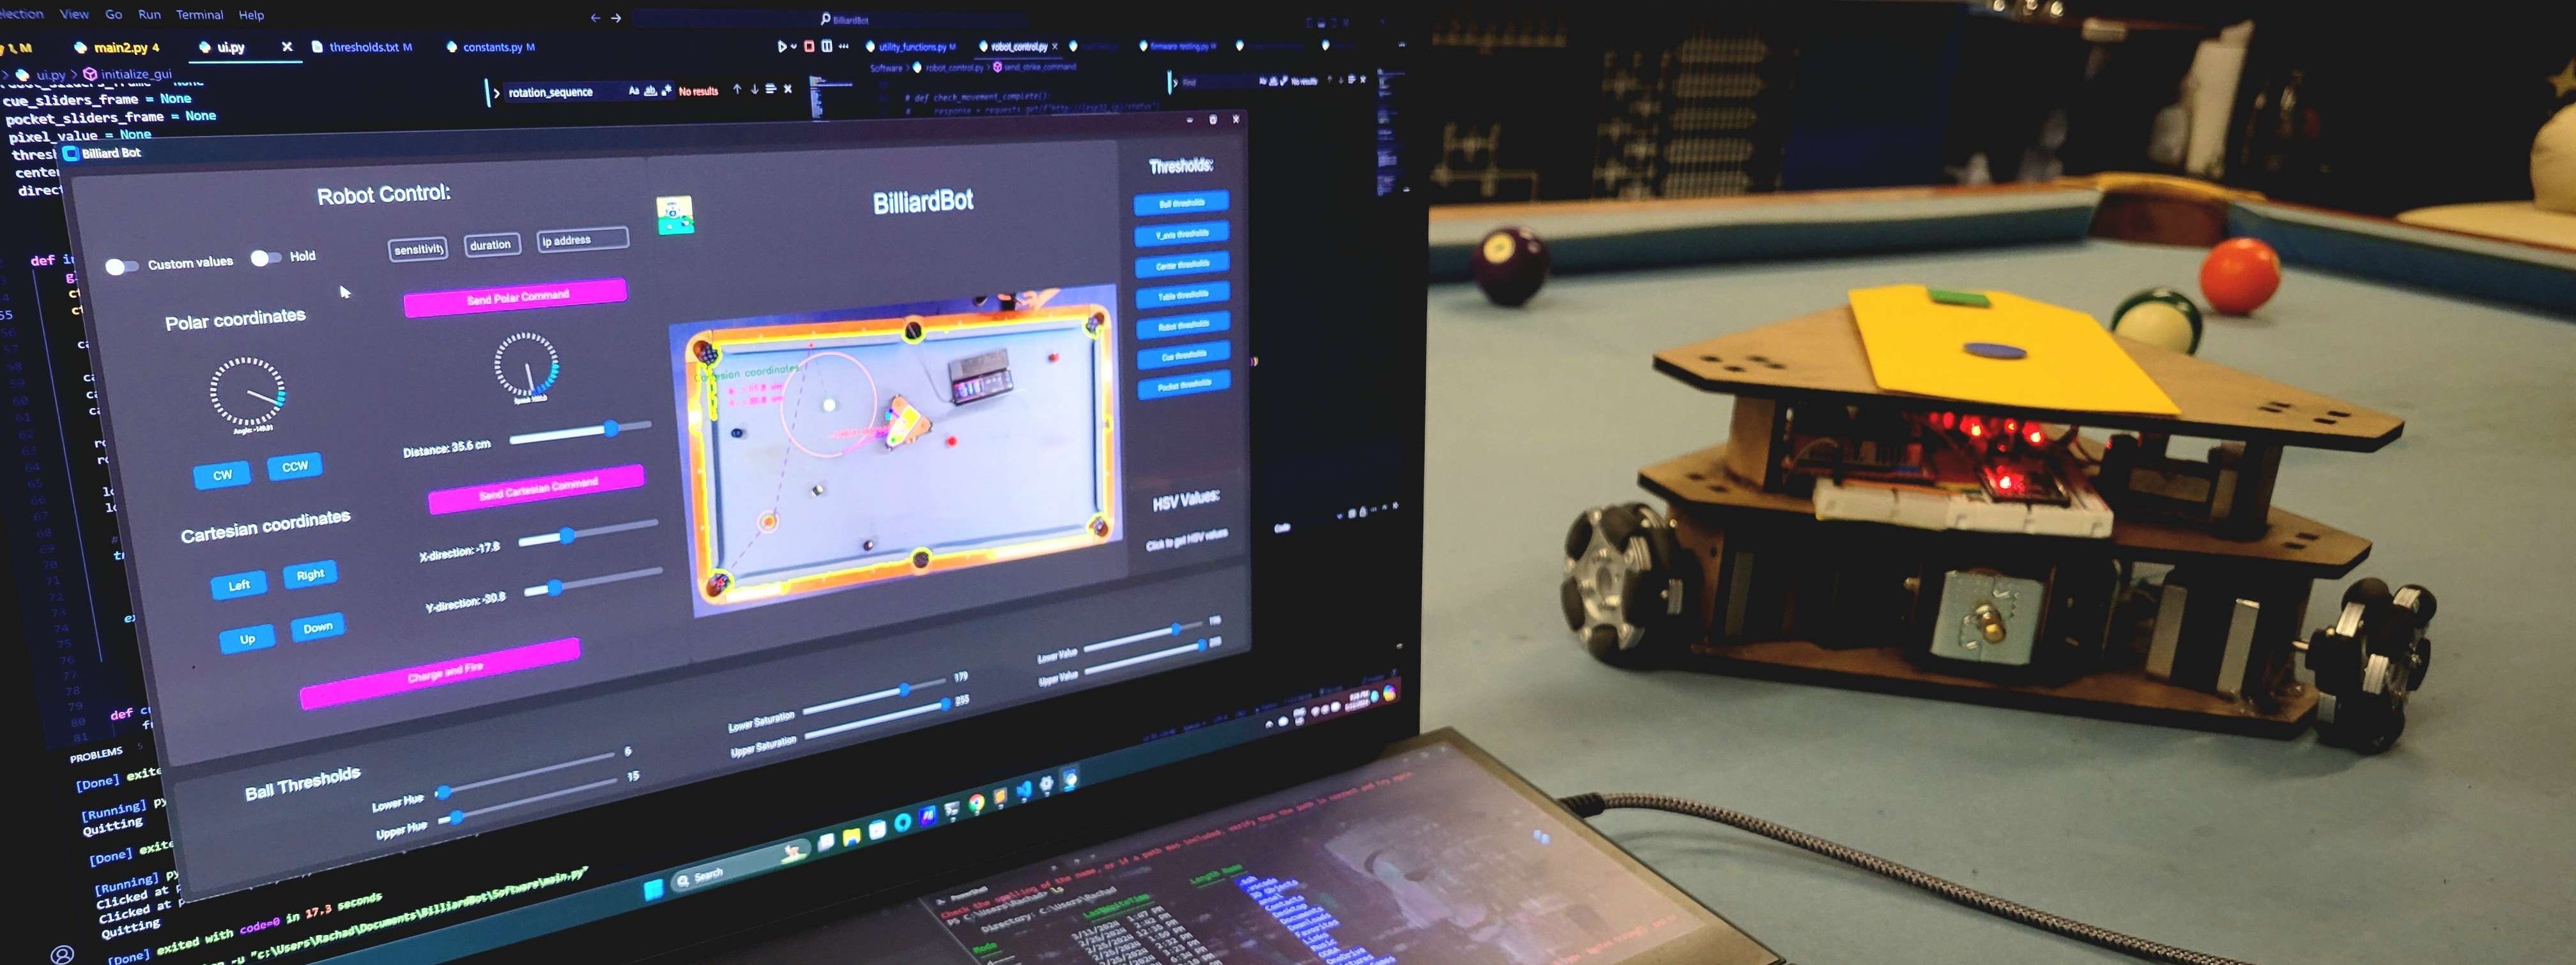
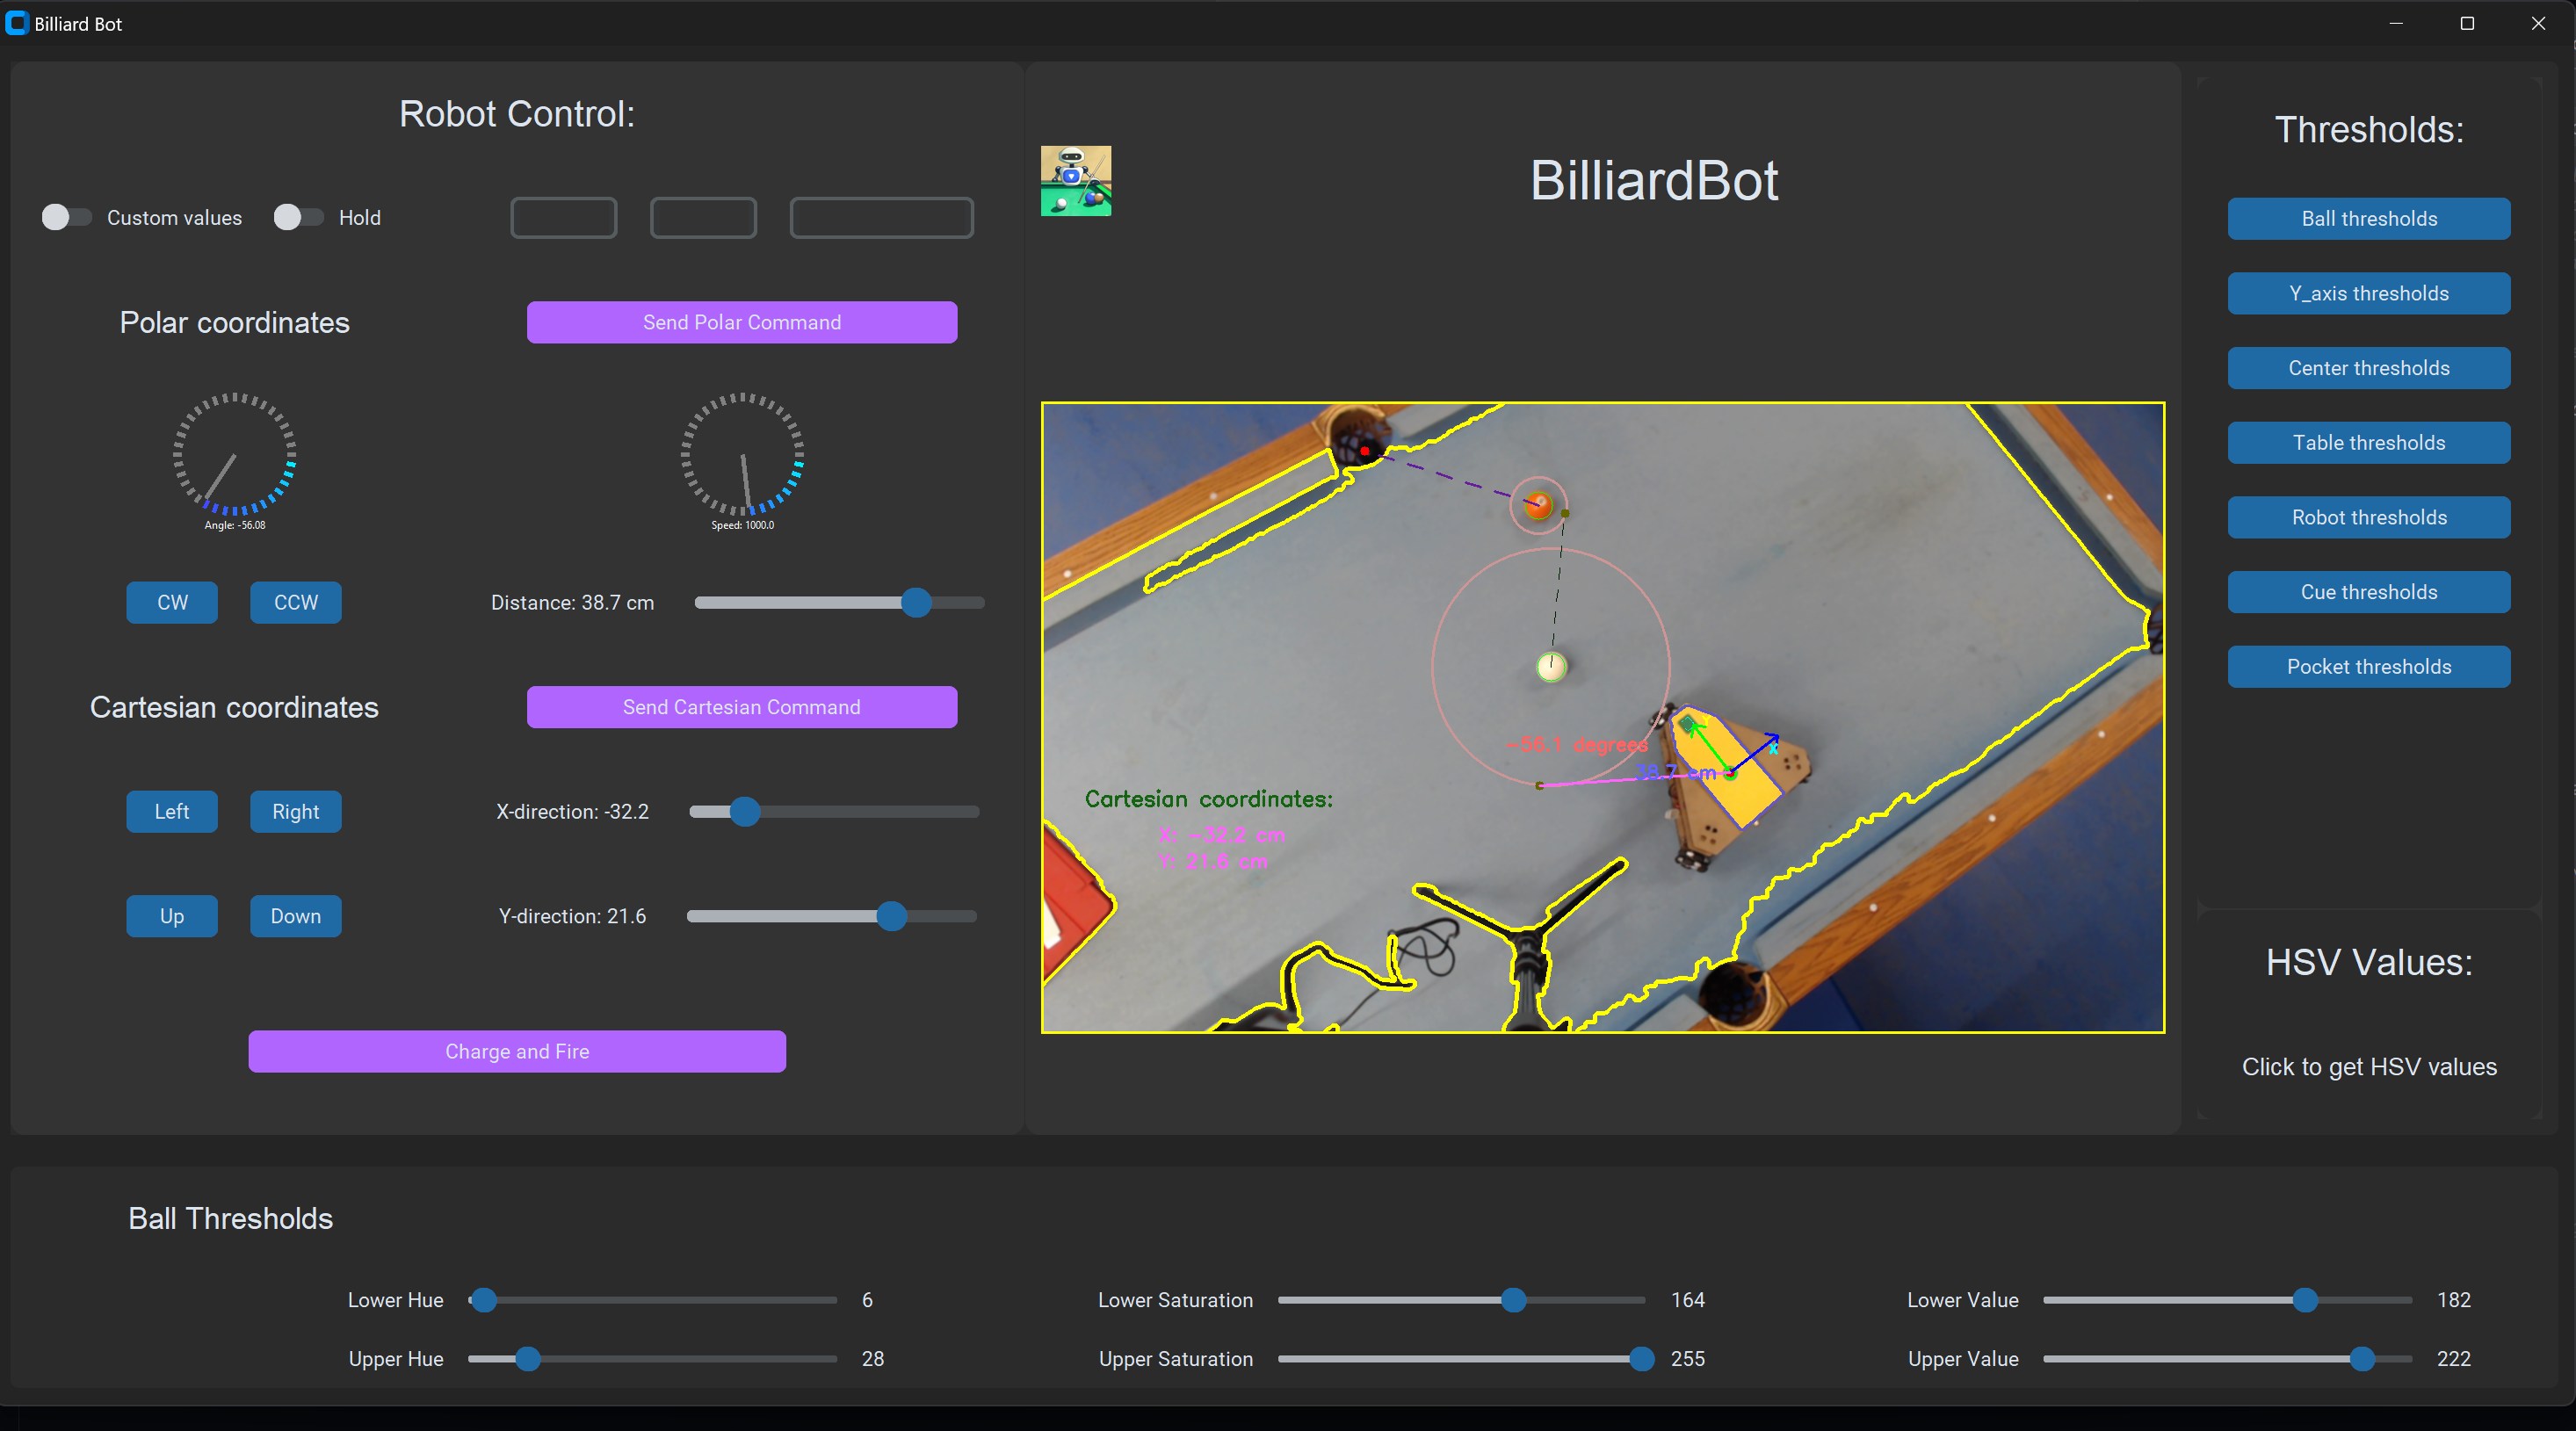
the main purpose of the GUI is for testing, I used Tkinter with the help of
CustomTkinter fora modern UI
I got the idea while doing ball detection with six adjustable parameters. To avoid repeatedly running the program for each change, I built a UI, making the process much easier as I see the changes in real time.


I added the robot's control section to perform basic movement commands and the firing sequence.
I will continue to update this section with additional content as it becomes available.
side view (speed x2)
top view (speed x2)

Training an Machine learning model that accurately detects and classifies balls into four categories: black, cue, solid, and stripes
Compute all possibilities and determine which ball to hit in order to maximize the score in a row. After striking using physics, we aim for the ball to finish in a position that is favorable for the robot to score again or making it more challenging for the opponent.

Play the game with less human intervention, i.e., knowing when it's not its turn, so it waits for the other player to strike.